Alarm Settings
The Alarm Settings allows you to manage all the alarms you are using. You can open the Alarm settings in the Network Profile through the following ways:
- On Start Page: Double-click a network profile in the Network Profile section to open the Profile Management dialog
box. You will find Alarm Settings on this dialog box.
- In an analysis project:
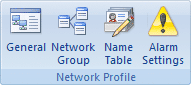
- On the Ribbon: Click the Alarm icon on the Network Profile group of the Analysis tab of the Ribbon (figure below).
- In the Alarm Explorer window: Double-click an alarm item or click
 on the toolbar.
The Alarm Settings appears as follows:

Buttons
- Add: Create a new alarm rule.
- Delete: Delete the selected alarm rules.
- Properties...: Click to open the Edit Alarm dialog box to
change the selected alarm.
- Delete: Click to delete the highlighted alarm.
- Import: Click to load the alarm settings from an .clalam file.
- Export: Click to save the alarm settings to an .clalam file.
- Enable all: Click to enable all the alarms in the list.
- Disable all: Click to disable all the alarms in the list.
- Inverse: Click to disable the checked alarms and enable the unchecked ones in the list.
Log Options
Save triggered alarm records to a file are useful for your later evaluation since you may not always stay with the machine. For example, you set up some alarms then you leave the computer. When an alarm triggered, the program saves the record to an .txt file. You can open the text file and examine the records.
- Log File: Click the folder selection button to choose a folder and
enter a name for the alarm log files to be saved.