
If no filter enabled, Colasoft Capsa will capture and analyze all the packets transmitting through your adapter. Thus a filter is an important way to filter out those packets you are not interested in.
A filter enabled, Colasoft Capsa will capture packets matching with the filter's criteria but drop those failed. You are able to save you time on finding useful data of network anomalies or attacks among countless items. Once a filter created, you can use them in every project.
You can open the Filter dialog box through the following:
In an analysis project: click the Filter icon on the Analysis tab of the Ribbon (figure below).
The Filter dialog box appears as follows:
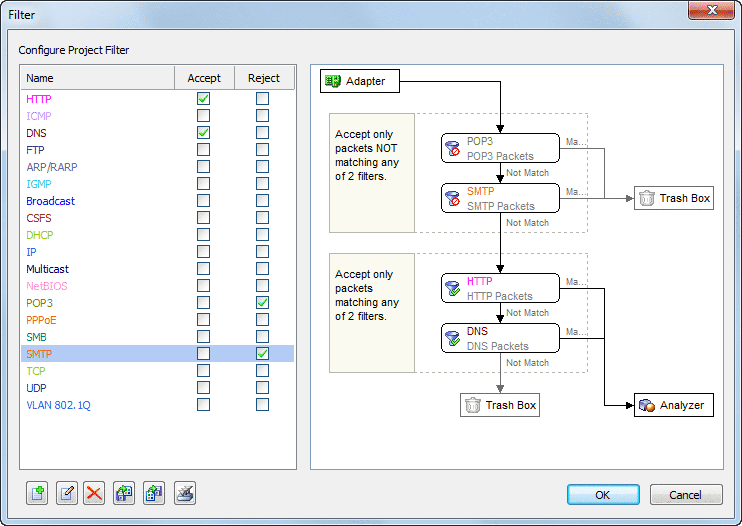
The Filter dialog box is divided into three parts:
Filter list shows all filters including filters created by you. There are two checkboxes in every filter item. If you need to accept a kind of packets, check Accept. Otherwise, check Reject. You may also check multiple boxes to define packets capturing range.
Double-click any filter item in the list to open the Filter dialog box to edit the filter. In the Filter dialog box, you may change its settings in Simple Filter tab and Advanced Filter tab.
The Filter flow-chart refreshes when you make any change on the left pane and shows how the packets are processed when Colasoft Capsa captures them. Packets match Accept condition will be accepted and passed on to the next stage, packets match Reject condition will be dropped.
You can find the following buttons on the bottom of this dialog box. All buttons are described below:
| Back |
| Copyright © 2001 - 2010 Colasoft. All rights reserved. |